#345

IMG_20151014_183825

I did quite a bit today, and am certainly going to bed soon. I’ve been out twice, to have lunch with my partner, and to check my postbox. I received only one package today, being a gem mould that I bought.

Unfortunately, despite double checking all the description, the measurements weren’t labeled as centimetres, but for some reason, I had assumed they were inches. The mould is a cute 11 by 8 cm, and still useful at this size. I am currently trying nail polish for the first casting, so I can look at the designs with detail.

IMG_20151014_183851

While I had the nail polish out, and had already filled the house with noxious fumes, I decided to give my fake nails a coat, as well as my tissue creatures. I’m not a fan of fake nails, I just wanted to paint on them, so I bought some cheap ones from eBay to practice. I thought of using glue dots to wear them, so I can take them off as soon as they annoy me too much, which shouldn’t be long.

Yesterday and today, I have made a load of paperclay using toilet paper, water and PVA glue. I filled a few different moulds, which are all drying at the moment. This might take a couple of days, as they contained a lot of water. I try to leave them longer than I should, in case little areas like the nose are hiding wet spots down the bottom. It’s going to be hot weather tomorrow, so that should help it along.

Having all this time isn’t making my house look any cleaner. I just keep making more mess!

#309

image

“I’m going to stay up tonight. There are things in this house that aren’t covered in glue and paper,” I declared to my partner, as he was going to bed. He looked at me with amusement and left the room. I had been reading the sports pages, strip by strip, as I covered random objects with paste and last weeks local newsprint.
The end. Based on a true story.

Today found myself in a shop with money and fifteen minutes to wait, so I looked for some things I needed to get, none of which I could find. So I discovered they have a newly created teeny tiny arts and craft section. They were rather cheap and mostly aimed at kids, with a small card making rack. I picked up a few things from here. I got some stencils that were aimed at kids, but they looked rather vague for some of the complex designs that were there, and it looked like it would be fun filling in the blanks. I got the girl set and boys set, so 12 sheets in all, ranging from hearts, fairies and butterflies to monsters, cars and skulls.
I bought some cheap brushes for glue and playing around. They aren’t too bad, nice and springy with no chance of real hair used (my one stipulation on brushes.)
They had pretty clear stamps, as you can see, with large acrylic blocks. These designs will be great to use on cards, especially to emboss.
I also picked up a couple new nail polishes for gem making.
I had the thought the other day to make a paper mache bangle. I was going to use a 600ml bottle, but I couldn’t find one. While looking for something else, I came across a masking tape roll, sitting right in front if me. I covered it in alfoil and added it to my paper layer rotation.
So many layers. So little time.

#301

image

Reminder: invent odourless nail polish that is asthma friendly.
Next batch of overwhelmingly smelly yet very pretty objects popped out. They’re still soft, so probably should have waited a little longer, but I was impatient, and they’ll dry better not surrounded in the mould. I was looking at the other Mod Podge moulds that are in the set, and they have an actual gem shapes one. So, looking to be buying that asap. They’ll look lovely on boxes, I think and light enough for cards. Detailed for small projects. The bronze frames would work well as frames in a miniature room. The green and yellow ring fits inside a bottle cap, but I’m unsure what to do with that information.
If it wasn’t so cold, I’d do these things outside, maybe I should put it off until it warms up. Not like I have nothing else to create till then.
But they’re so pretty.

#300

image

Yay! 300 daily posts!
You may be wondering where I bought these cool looking gems and bee from, but I made them. Cool, huh? Using old nail polish (I love buying it but can’t apply it if my life depended on it, so I use them from craft,) I filled some small moulds full of nail polish, and waited for it to dry. When it dries, it kind of depletes, leaving a shell, so I refilled it once more with the polish, and when that dried, I filled the rest with glue, all before taking it out of the mould. The bee was a lot trickier to get out of the mould, but that was a sculpey mould, and wasn’t as dense as the other, Mod Podge brand mould that I used, which works so well. It takes quite a while for each layer to dry, and our house now smells like a nail salon, but I think they look awesome. The glitter polish seems to look best on the smooth cabochons, and more detailed ones are better with plain or superfine glitter. I have another bunch of experiments drying at the moment using the Mod Podge mould, including two colours and all the different shapes. Now that I think about it, I have a Wilton mould that might act similar to the Mod Podge one. There’s a whole bunch of moulds that I’d like to buy.
I’m working slowly on the website. Really slowly. Getting back into the swing of coding is fun, but there’s a lot that has changed. It’s less HTML and more CSS, and when did DIV replace tables? Eh, even getting the layout and colours right is tricky. Don’t even talk to me about the logo. I printed out a test and the raspberry colour was pixelated orange with unreadable words.
I brought out my tablet today after watching a video on Photoshop colouring techniques that I hadn’t seen before. Unfortunately, one of my cats decided it was a good time for cuddles, and kept stepping on my keyboard, changing my settings all the time. At least they don’t get messy stepping on my digital painting.

#195

image

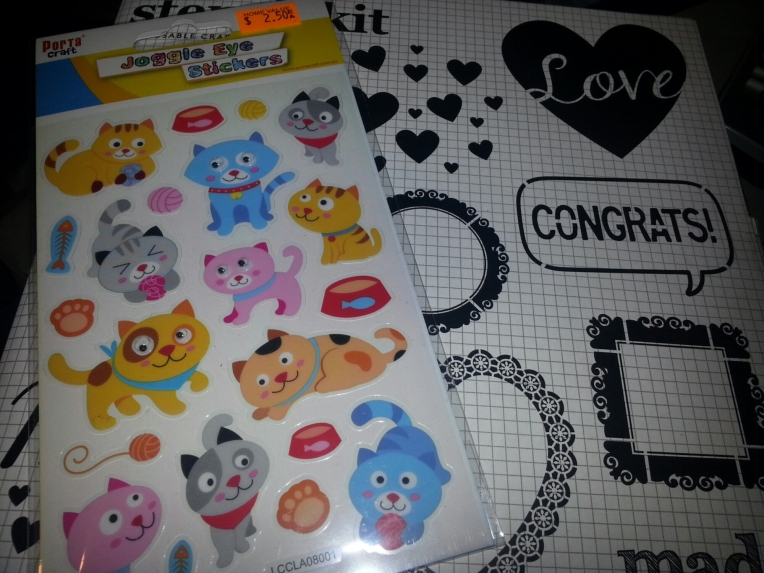
Kitty stickers. Yaaay!
Also a stencil kit I got from Typo, a paper/novelty item shop. I haven’t done a lot with stencils, so I’m keen to try some gesso and paint techniques. They had Christmas and palm tree themed one, but I thought the love one was more versatile throughout the year, also I love love hearts.
I also bought some green glitter nail polish to put on cards. I think it gives a nicer coverage than glitter glue itself, and I can use it for other crafts or even put it on my nails! I wasn’t allowed glitter before I moved out, so I’m going crazy with it now. My cats are often sparkly by accident.
I have been crafting more than I’ve been posting, mainly because I want to write a tutorial, so I need to cover all bases and make a few different types before I write it up. I’ll try and get that done soon so I can show you guys everything.

Day #144

image

So, I’ve been growing some flowers, getting a Winnie the Pooh head in life and getting plaster of paris-ed.
So, Winnie was taken from a mould I have where you stuff toilet paper and water into the mould and it makes super lightweight, super cheap embellishments with no difficulty added. It does take a little while to do, but it doesn’t need your undivided attention… Might be why mine took a while :P. But what you do is get a roll of toilet paper, rip off squares, then rip them into pieces. Depending on the size and detail determines how big the pieces you need are. I used a spray bottle to spritz whenever the paper got too dry. The reason you use toilet paper for this, and you don’t need glue is that toilet paper is designed to dissolve into pieces in water, so the fibres interlock and dry into their new shape. I learnt this off a you tube video (I can’t remember which one, sorry.) But if you search there, you’ll find video instructions.
As for the flowers, I saw an idea making the nail polish flowers into a head-wreath. I’m not sure why, but the past load of these flowers I made got holes in the petals. Perhaps the polish was too old, or I didn’t let them dry properly before sticking then in a container and they poked each other. I’m thinking of putting another coat of polish once they are dried to make them stronger. I bought some floral tape, so that I don’t get stuck with all the wire in the head and hopefully it’ll keep it looking nice.
Lastly, I’m getting around to painting my plaster pieces. It took a few days to dry, due to being the middle of winter. You can tell they’re dry when they are about room temperature. Cold = moisture = not dry yet… Unless you have a really cold room.

Day #109

image

I was watching YouTube today (big surprise) and on the channel Threadbanger they have Man vs Pin, where the guy tries out things from pinterest to test their validity. In the video he was trying out nail polish wire flowers and failed hard. He eventually got tacky glue and covered it with that first but it really isn’t necessary. I deduced that his petals were too wide- the smaller the space the easier and he was trying to paint it on like an invisible petal was there. The idea is to form a surface exactly as though you were making a bubble. You need a lot of polish on the brush, so its nearly dripping, and slide it sideways along the section. Once the polish makes a surface, you’ll be able to see any thin spots. You need to rotate the flower to even out the polish or it will pop. It’s very easy once you get the hang of it, doesn’t take long and they look so pretty (the pic does no justice.)
Before adding the polish, you need to make the flower, just get some thin, flexible wire and twist petals, a stem and maybe a leaf or two. There are tutorials on this on the net but I just played around until I liked the look.
I used a polystyrene block to stick my flowers in as they dried. It’s quick drying but I think if you laid them down, all the polish would end up in one direction.